Spyder3Elite Review
Review Date: March 10th 2007
Author: Jon Canfield
Leave a comment about this Review
Introduction
Monitor calibration has become fairly mainstream over the past few years. Nearly everyone knows they should be calibrating their displays, and a fair percentage of them are actually doing it. And, with the cost and ease of use down into the normal (i.e. non-geek) level, there is really no reason to not calibrate your display. Display calibration is important in order to ensure that the colours you see on your screen are going to be the colours seen on someone else's screen, or on the paper when you print. This is a simplistic explanation, but it gets the point across � the first step in colour accuracy is with an accurate display.
There are several good products out now that can handle the calibration process for you. X-Rite has the i1 Display 2, PANTONE has the huey Pro, and DataColor has the Spyder. All will do a good job, some with more control than others, but in general, you can use any of these devices and have a properly calibrated display. So, with so many options available, and all of them good, why bring out a new device? Like everything, there is always room for improvement. And, with the new DataColor Spyder3Elite, that improvement is both welcome, and visible.
What's New
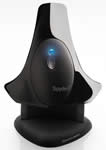
The Spyder3Elite is the top of the line version of DataColor's colourimeter products. The main differentiation in all the Spyder3 products is the level of software functionality you have. With the Elite package, you have total control over the critical settings like colour temperature, gamma, and luminance.� The new Spyder uses a 7 colour detector �engine and a larger light aperture to improve performance and colour accuracy over both the previous Spyder2 and competing brands. The larger detector makes the Spyder3 more accurate when profiling wide gamut displays, including those that are capable of displaying the AdobeRGB colourspace. Also new to the Spyder3 is an Ambient Light Control which will automatically measure the light in a room at regular intervals to help you keep your display accurate when changes are detected to the ambient light.
Figure 1
On the software side, DataColor has completely reworked the user interface to make it easier to navigate through the various options. Like before, there are two modes. A guided Wizard mode for those that just want to get calibrated and back to work, and a Expert Console (Figure 2) for those of us that like to know what�s going on and make specific selections. At all points in the process, regardless of which mode you�re in, there is extensive help available.
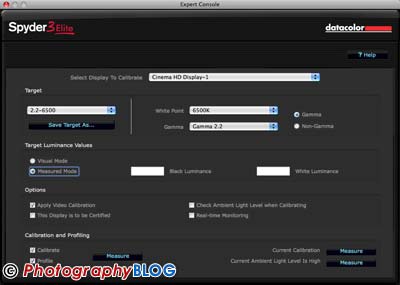
Figure 2
Compare Prices
Support PhotographyBLOG: Buy the Spyder3Elite from one of our affiliate retailers:Setup
To get started, after you've installed the software and plugged the Spyder3 into an available USB port, launch the Spyder3Elite program to get started. If you have multiple displays, you'll have the opportunity to select which display you want to calibrate (the software will profile multiple displays). To use the Wizard interface, just click the Next button and you'll go straight to the Calibration screen. If you wish to make changes, click on the Change these settings button and you'll be taken into the Expert Console where you can tweak settings to your heart's content (Figure 3).
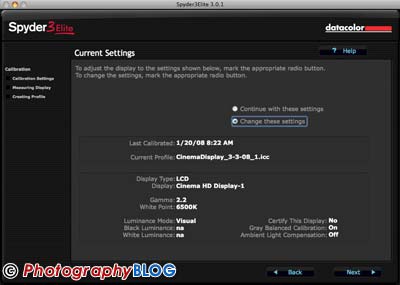
Figure 3
At all times, helpful text tells you what your options are. You have complete control over settings for colour temperature, gamma, gray balance, and ambient light compensation. The calibration process (Figure 4) measures different colour values determining what your display is capable of reproducing, and then making adjustments to the video settings to give you an accurate rendition of colour. The new version is much faster than before, taking about 5 minutes total compared to the 9-10 minutes the previous Spyder required.
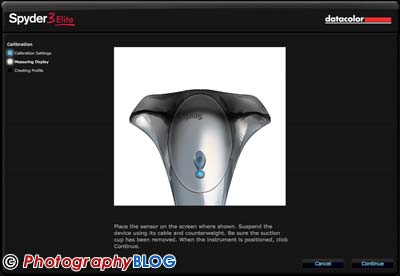
Figure 4
Once calibration is completed, you'll see a summary of the results. From here you can go back and recalibrate if you feel it necessary, or you can finish the process and check a before and after to see what you've got (Figure 5).
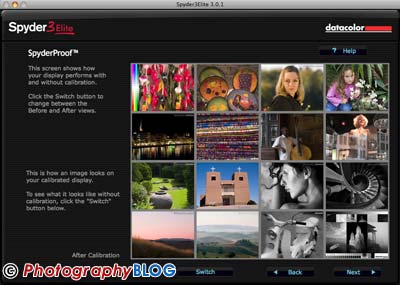
Figure 5
Once very nice feature in this before and after window is the set of images used for validation. DataColor has done an exceptional job of selecting a range of images that will suit any type of work you do, from colourful landscapes, to skin tones, to black and white. To make it easier to check the results, you can click on any quadrant of images to zoom into that set (Figure 6). You can also click again to zoom into a single image if needed.

Figure 6
If you already have a profile created and in use, the next time you launch Spyder3Elite you'll be asked if you want to recalibrate or just check the current calibration (Figure 7). Doing a CheckCAL reduces the time required to profile to under 3 minutes and gives you a report on whether a full recalibration is needed (Figure 8), at which point you'd run ReCAL.
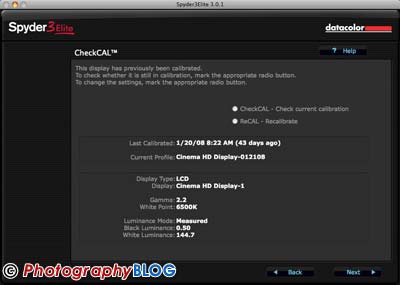
Figure 7
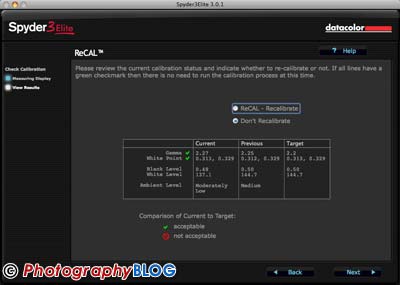
Figure 8
I compared the results from the Spyder3Elite to the profile I created with X-Rite's i1Display 2 and EyeOne Match software. Both tools produced excellent profiles with slight differences. I found that EyeOne Match gave me warmer tones and a slightly brighter display than the Spyder3 did, while the Spyder3 gave more neutral grays and slightly better shadow detail. The differences are too slight to see reproduced here, but they are visible.
Using ColorThink Pro to examine both profiles, the Spyder3 produced a profile with a larger gamut volume (1,029,370 compared to 841,866 for EyeOneMatch) on my 30� Apple Cinema Display. The chart in Figure 9 shows the differences, with the Spyder3 colour space shown in red and the EyeOne in white. Again, the differences on screen are slight and either would be considered an excellent profile for photo editing work.
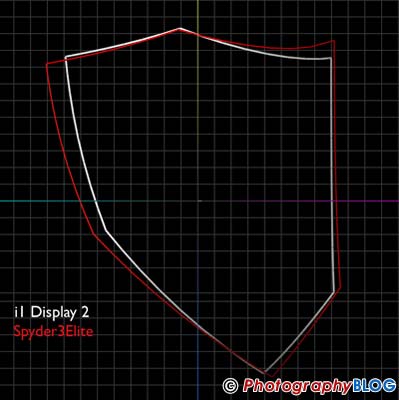
Figure 9
Although I didn't test it for this review, the software supports profiling of digital projectors as well by placing the device in the included stand. Finally, the software gives you a wealth of information through different reports available in the Tools menu (Figure 10). Not shown here, but also supported is reading of spot screen colours.
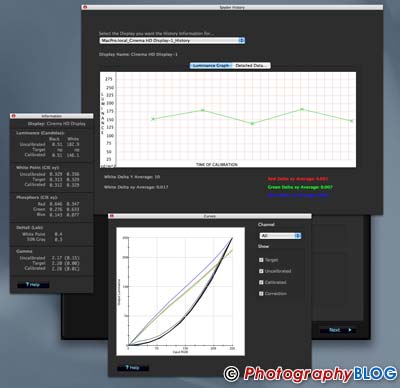
Figure 10
Conclusion
| |
|
|
Ratings (out of 5) |
|
| Design | 5 |
| Features | 4.5 |
| Ease-of-Use | 5 |
| Value for Money | 4.5 |
The new $279 Spyder3Elite is a very nice upgrade from the previous version. With greater accuracy and reduced profiling times, even users of the Spyder2 should consider upgrading to the latest hardware. If you're already using the X-Rite i1 Display 2, I don't see a reason to run out and replace your existing hardware. If you're just getting started with colour management, this is an outstanding option that will serve you well for years. When combined with DataColor's Spectrocolourimeter package, you have a full setup for both monitor and printer profiling at a fraction of what this setup would have cost even two years ago. The Spyder3 is also available in a Pro configuration for $169. The Pro uses the same hardware device but limits the software options and removes the ability to profiles projectors.
Leave a comment about this Review