Colormunki Photo Review
Review Date: April 9th 2008
Author: Jon Canfield
Leave a comment about this Review
Introduction
At this year's PMA show, X-Rite held a sneak NDA event to show a new color management product. I was lucky enough to get a beta unit shortly after PMA and have been using it for the past couple of months. But, I don't review beta products, so I've been holding out for the release version of the software. The product is ColorMunki Photo. The ColorMunki Photo combines high-end technology with easy to use features and a more palatable price tag for most users.
Typically, you would buy a monitor calibration device like a DataColor Spyder3 or an X-Rite i1 Display 2. These are both colorimeters that sit on your monitor and read a series of colors to define what your monitor is capable of reproducing. In the case of the Spyder3, you can also calibrate a digital projector. Both of these products cost about $250.
This doesn't give you the ability to create custom printer profiles though, which is becoming more important for a large number of digital photographers as they get into creating high quality prints of their images. Until now, you were looking at either the DataColor Spyder3Print at $499 (the Spyder3Studio bundle is available for $599 and includes both the Spyder3Elite and Spyder3Print products) or the X-Rite i1 Photo. The i1 Photo LT is a spectrophotometer that is generally regarded as a more accurate device for measuring color.� This product does both monitor and printer profiling at a cost of $1095. But, to have the best possible quality printer profiles, you also needed to purchase additional software, such as the $2495 ProfileMaker software.
ColorMunki Photo changes all of that though with a single product that does monitor, printer, and projector profiling, all for $499 (Figure 1). This isn't a stripped down hardware product either. It uses the same spectrophotometer found in the high end profiling devices sold by X-Rite, but it brings a much friendlier interface that is more intuitive for the average user.

Figure 1
Compare Prices
Support PhotographyBLOG: Buy the ColorMunki Photo from one of our affiliate retailers:Ease of Use
If you've ever profiled your monitor before, you'll be comfortable and familiar with this part of the process.� If you have multiple displays, you'll select the one you want to profile (ColorMunki Photo will profile multiple displays for you) and select whether you want easy or advanced mode. Advanced mode (Figure 2) lets you set the color temperature and measure ambient room light to optimize the display. To be honest, I found very little difference between the easy and advanced modes. The ColorMunki Photo comes with a padded case and strap that you'll hang on your monitor in the location shown on screen (Figure 3), and then the software will display a range of colors that the ColorMunki Photo will read. When completed, the ColorMunki Photo creates a profile for you and gives you the opportunity to see a before and after view before setting it as the default profile (Figure 4). You can also set the frequency to be reminded that your display should be recalibrated.
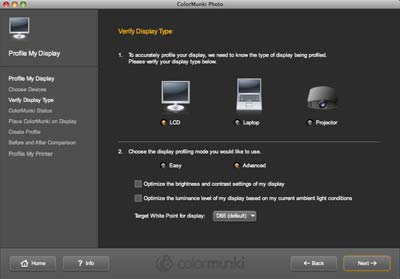
Figure 2
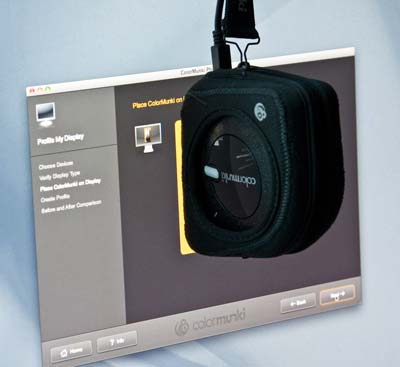
Figure 3
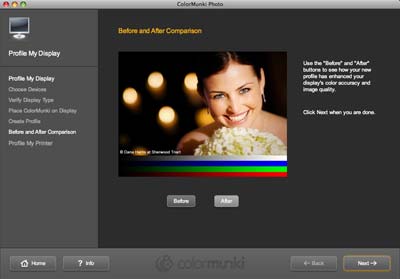
Figure 4
Profiling a projector works the same way as a computer display, but rather than placing the ColorMunki Photo on the screen, you mount it on a tripod using the built-in adapter, and point it at the screen. One feature that will appeal to the newcomer especially, is the on-screen directions. When you use the ColorMunki Photo, it has a built-in calibration routine. The software directs you to turn the dial to the correct position for the current operation and lets you know when it's ready for the next step (Figure 5).
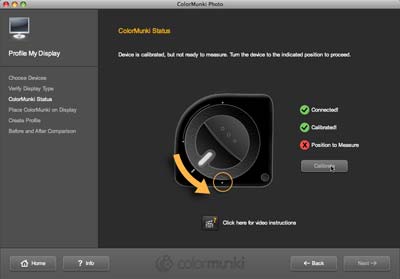
Figure 5
Printer profiling is where ColorMunki Photo really breaks new ground though (Figure 6). Typically, a high quality printer profile uses 1,000 or more color patches to generate a profile for a particular paper and ink combination. The DataColor Spyder3Print is able to produce high quality profiles with about 500 color patches (including the extended grays target to improve black & white print quality). ColorMunki Photo, on the other hand, breaks the profiling process into two parts. It creates a 50 patch chart which is printed and measured (Figure 7), and based on the results of that measurement, creates a second 50 patch chart. So, you're scanning a total of 100 patches. The scanning process itself takes only about 30 seconds to complete, although you do have to allow time for your prints to dry prior to scanning. So, plan on about 25 minutes from start to finish for a printer profile. When the profile is completed, ColorMunki Photo will automatically set that as the default print profile for Photoshop, InDesign or Quark Xpress if you want.
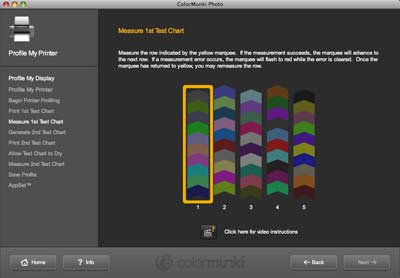
Figure 6
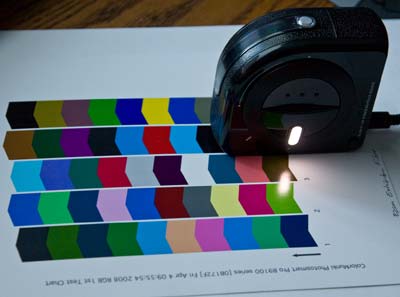
Figure 7
What amazed me was the accuracy of these profiles. I've used small patch targets before with less than acceptable results. Usually there is much less shadow detail and colors go out of range earlier than with a high quality target. The ColorMunki Photo though surprised me by being almost identical in quality to what I was able to generate with the i1Photo and ProfileMaker combination (Figure 8). Remember that we're now talking about a $499 product versus the $3,500 products I've been using.
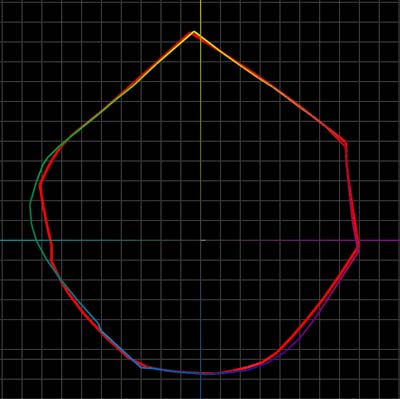
Figure 8
The ColorMunki Photo adds a few more features as well.� You can also create CMYK profiles and do spot color measurements. Finally, if the generated profile isn't completely to your liking, you can optimize the profile by using an image of your choice. The software will analyze the selected image and generate another 50 patch chart to measure. So, if skin tones are critical, or you're doing extensive black and white work, you can create a profile that is tuned to that type of output. This optimization process can be repeated with different images to continue to optimize the profile.
While monitor and printer profiling are the key elements for most users, if you work with other people and color accuracy is critical, some of the additional features in ColorMunki Photo will be of interest. Digital Pouch (Figure 9) is a way to bundle images along with their embedded profiles into a color managed viewing application. Most email clients and web browsers don't understand embedded profiles and will default to using sRGB. If your documents are in a different color space, they may look very different than intended.� After adding your images, click on the Create button and a self-contained viewer is created that you can send off to clients or publishers.
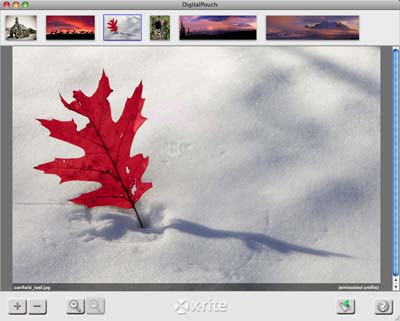
Figure 9
Photo ColorPicker (Figure 10) allows you to create palettes of complimentary colors based on any image. When you select an image in the browser, all the primary colors will be displayed. Selecting any one of those patches shows you the related colors in Harmony, Variation, or Similar groupings. This is helpful for designing around a image. Although probably not an everyday need for the typical photographer, anyone in design or layout will appreciate how much easier this makes color selection.
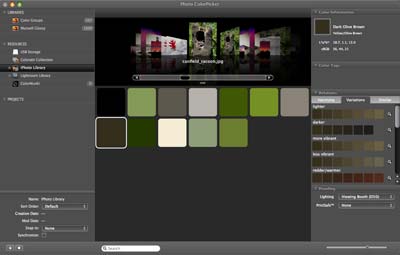
Figure 10
Conclusion
| |
|
|
Ratings (out of 5) |
|
| Design | 5 |
| Features | 5 |
| Ease-of-Use | 5 |
| Value for Money | 4.5 |
X-Rite has a real winner with the ColorMunki Photo. Combining monitor calibration with printer profiling at a reasonable price, the ColorMunki Photo should take care of all your color management needs. The additional features, like the ability to optimize a printer profile for specific needs, and the Digital Pouch for sharing and viewing color managed images are intuitive and go a step beyond what anyone else has available.
The process isn't foolproof though. You still need to pay attention to printer settings in order to get the most from ColorMunki Photo or any profiling solution. With the wrong options set in the printer driver, you can create a profile that is unusable. X-Rite has done everything on their part to make the process easy, but you have to do your share.
Leave a comment about this Review