Olympus E-300
(Olympus Evolt E-300 in the USA)
Review Date: April 13th 2005
|
Ease of Use
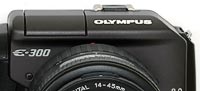
The Olympus E-300 easily wins the award for the most eye-catching digital SLR camera currently available, thanks to the use of a TTL Optical Porro Finder instead of a traditional pentaprism, which gives it a flat elongated profile. Olympus have set out to make a camera that stands out from the crowd, and they should be applauded for providing some fresh ideas and innovation in the entry-level DSLR market where competition is fierce and profits per unit are small. It also helps them to keep the price of the E-300 so affordable. The downside of using the TTL Optical Porro Finder design in the real world is that the viewfinder is a little dim, although by no means annoyingly so. And you may not actually be that keen on the cosmetic appearance of the E-300, which has been called "ugly" in some quarters.
So the Olympus E-300 has a very distinctive look, but what is it actually like to handle and use? Despite the removal of the pentaprism, the Olympus E-300 is still quite a hefty camera, weighing over 500g and going against the recent trend of tiny DSLRs set by the Canon EOS 350D and the Pentax *ist DS. The Olympus E-300 feels solid, chunky, tank-like - quite an achievement considering the price-point. I'm glad that Olympus have resisted the temptation to make their new DSLR as small and light as possible, and have instead opted to make it useable by someone with average sized hands. The rather plasticky 14-45mm lens feels well-balanced on the Olympus E-300 and the camera has a great contoured handgrip on the right-hand side that enabled me to use three fingers to hold it and my right forefinger to operate the shutter button. There is also a rubbery grip where your right thumb sits, with the rest of the body finished in a mixture of matt black and textured plastic that can also be found on Olympus' high-end prosumer digital cameras (like the C-8080, C-7070 and C-5060).
The Olympus E-300 is generally very well-made, with most of the external controls again feeling more expensive than they actually are. The only aspects of the overall design that show that the Olympus E-300 is an entry-level DSLR are the plastic shooting mode and magnify dials on the top of the camera - they're perfectly usable but do feel cheap. Otherwise you really do get a lot for your money in terms of the build-quality - this camera may be made of plastic, but it's still amazing that you can get this level of workmanship at this kind of price.
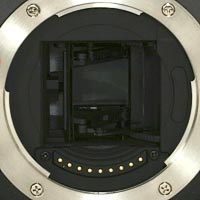
| Where's the pentaprism?! | TTL Optical Porro Finder |
 |
 |
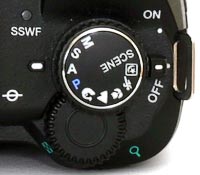
Considering that this is a complicated digital SLR camera with an array of advanced features, the Olympus E-300 has a very clean and uncluttered design that will be familiar to anyone who has used a DSLR before. I counted 17 external controls in total, which actually makes it less complex than some of Olympus' compact digicams! This helps to make it accessible to its target market of first-time digital SLR users, although I strongly recommend that you read through the excellent user guide first (supplied on a CD). The Olympus E-300 follows conventional DSLR design in having a shooting mode dial on the top, which allows you to select either an advanced mode like Aperture-priority or one of 5 commonly-used scene modes. There are actually 14 scene modes in total - you set the shooting mode dial to SCENE in order to access them all via the LCD screen on the rear of the camera. The dial next to the shooting mode dial is controlled by your right thumb and allows you to select apertures/shutter speeds and zoom in and out when viewing an image on the LCD screen.
The Olympus E-300 isn't so conventional in terms of how the LCD screen works. On most DSLRs the screen is blank until you activate a menu or playback an image. By default on the Olympus E-300 it shows all the current settings - aperture, shutter speed, ISO speed, white balance etc - even when you hold the camera up to your eye and look through the viewfinder. You can toggle this on and off by pressing the info button if it annoys you or want to save battery power - I found in practice that I just left it on all the time, even though I could see it at the bottom of my vision when taking a photo. Turning it on and off all the time was more annoying for me, but your mileage may vary.
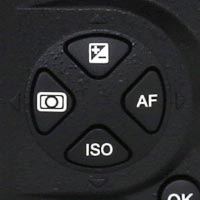
| Shooting Mode Dial / Magnify/Selection Dial | Arrow Pad |
 |
 |
Utilizing the LCD screen in this way does allow you to quickly change the major settings very quickly via a combination of the external buttons and the dial. It's simply a matter of pressing the right button, which highlights that setting on the LCD, then turning the dial to change the setting. Very quick and effective, although you do have told the camera in front of you to see what you are changing. The same info is also displayed in a small area in the right of the viewfinder, but I found it less practical to change the settings whilst looking through the viewfinder as my face was pressed up against the back of the camera where all the buttons are located (although altering the aperture and shutter speed is thankfully much easier).
The menu system of the Olympus E-300 is as well designed as previous Olympus digicams that I have reviewed. The four corners of the arrow pad act as directional buttons, allowing you to scroll through images and the menu system, but they also have their own specific functions as well. For example, the top button of the four allows you to select exposure compensation, whilst the bottom one accesses the ISO speeds. This ensures that a lot of the controls are available by pressing buttons rather than scrolling through menus, which makes using the camera quicker and more immediate.
Pressing the Menu button above the arrow pad accesses the rest of the menu options, and with this being a DSLR there are a lot of them - I counted 35 in total split into 5 sub-menus. All of the 8 options in the first menu can be accessed via the external controls, however, so the less commonly used options are accessed through the menu system, whilst the more commonly used ones are available via the press of a button. You will also only have to set about half of the settings once and can then forget about them. The Olympus E-300's menu system is bright with a large font size making it perfectly readable even in low light.
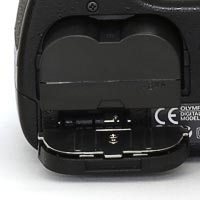
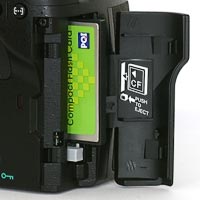
| Battery Compartment | Memory Card Compartment |
 |
 |
The start-up time of the Olympus E-300, from turning the camera on to being ready to take a photo, is quite quick for a DSLR at around 1.5 seconds. Focusing is very quick in good light with the standard kit lens and the camera happily achieves focus indoors and in low-light situations. The AF Assist light can only be used if the built-in flash is raised though. The 14-45mm kit lens does have a rather noisy focusing mechanism, but if you are upgrading from a compact digicam you probably won't care too much as the E-300 focuses more quickly and with a higher hit rate. The LCD screen is a little grainy but the refresh rate is perfectly acceptable. It takes about 0.25 seconds to store a SHQ JPEG image with no discernible lockup between taking shots, allowing you to keep shooting as they are being recorded onto the memory card. For RAW and TIFF images the Olympus E-300 also has no lockup between shots until the buffer of 4 images is reached - at this point you can still see through the viewfinder but you can't fire the shutter until the buffer has cleared. In the continuous shooting mode you can hold down the shutter button and take one RAW/TIFF photo roughly every 0.5 seconds for up to 4 images. In SHQ JPEG you can take 5 images at the same rate of one every 0.5 seconds.
Once you have captured a photo, the Olympus E-300 has an above average range of options for playing, reviewing and managing your images. You can scroll through the images that you have taken, view thumbnails, zoom in and out up to a magnification of 10x, and view fairly detailed information about each image. You can also delete an image, rotate an image, lock images so that they cannot be deleted, and set various printing options. There are also a few digital effects available which can be applied to JPEGs/TIFFs - Black and White, Sepia and Resize. The camera shows you a preview of what the effect will look like when applied, and the effect is applied to a copy of your image, thus preserving the original intact. Importantly the Olympus E-300 offers a histogram after taking a photo which is a great help in evaluating the exposure, plus any areas that are over-exposed flash on and off in the LCD preview to show you want you should be compensating for with your next attempt.
In summary the Olympus E-300 is an easy to use DSLR, unconventional in terms of how it looks but quite conventional in its operation. Importantly it is very well-made, with no corners being cut despite the low price-point. I really enjoyed using this camera, feeling instantly at home with it and taking some pleasing shots, which is really what counts at the end of the day.
|
![]() PhotographyBLOG is a member of the DIWA organisation. Our test results for the Olympus E-300 have been submitted to DIWA for comparison with test results for different samples of the same camera model supplied by other DIWA member sites.
PhotographyBLOG is a member of the DIWA organisation. Our test results for the Olympus E-300 have been submitted to DIWA for comparison with test results for different samples of the same camera model supplied by other DIWA member sites.