Reviews: Shortcut PhotoZoom Pro
http://www.trulyphotomagic.com
Introduction
Shortcut PhotoZoom Pro (formerly known as S-Spline 2) is a software program that promises to resize your photos without losing any quality. You can use it to interpolate, or blow up, your images to larger sizes. At the end of 2003 I needed a program like Shortcut PhotoZoom Pro for two reasons. I wanted to create a 30x20 inch print at 254dpi from a Canon EOS 10D source file, and I also needed to interpolate some 10D files up to 48Mb in size for submission to an image library. So did Shortcut PhotoZoom Pro deliver on its promises? Did it create a quality print for me and were my stock images accepted? Find out in my review.
Price
![]()
(out of 5
stars)
There are 2 different versions of ShortCut PhotoZoom available. ShortCut PhotoZoom Pro, which is the version that I am reviewing, costs €129.00. ShortCut PhotoZoom costs €49.00. There is a free trial download version available.
There are a couple of competitors to ShortCut PhotoZoom Pro. pxl SmartScale from Extensis costs $199.95, whilst Genuine Fractals 3.0 from LizardTech costs £99 excluding VAT. At the current exchange rates, ShortCut PhotoZoom Pro is marginally cheaper than the other two packages.
Features
![]()
(out of 5
stars)
There really aren't too many features in ShortCut PhotoZoom Pro, as it's a software program that has only one aim - to allow you to resize your photos without losing any quality. It's a very specialist package that you may never have any need for. ShortCut PhotoZoom Pro is specially designed for the demanding image processing professional; Desktop Publishers, PrePress and B2B (Astronomy, Medical systems, Security e.g. police). It features the most advanced S-Spline Algorithm, includes fine-tuning tools, a batch conversion option and an Adobe® Photoshop™ export plugin.
Ease of Use
![]()
(out of 5 stars)
ShortCut PhotoZoom Pro doesn't have a vast number of features, as mentioned above, so consequently it is very easy to use. There is only one screen in the application, shown below, which allows you to set all of the different parameters for resizing your photos. I have broken the Main Screen into the different parts so that you can easily see how the software works.
Main Screen
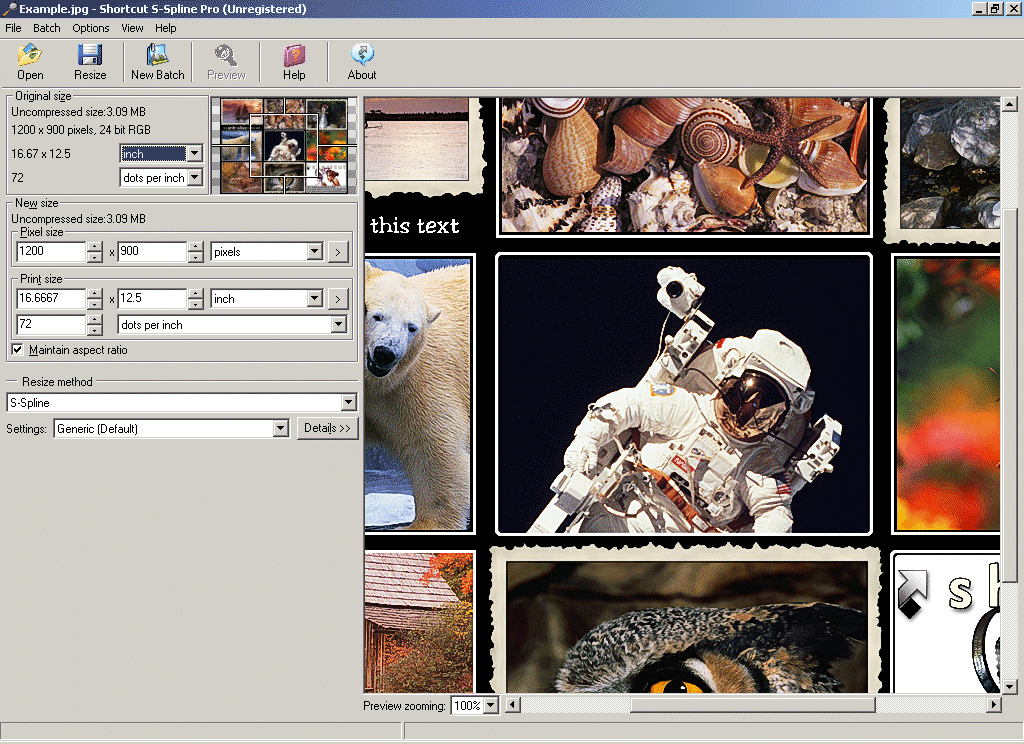
This is Main Screen which is shown when ShortCut PhotoZoom Pro is first opened. On the right is the Preview pane, which by default shows a sample image. On the left are the toolbar buttons and different options for controlling the resizing. And that's basically the entire interface in a nutshell.
Original Size
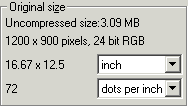
The Original Size part of the Main Screen shows details about the size and type of the photo that you are resizing.
New Size
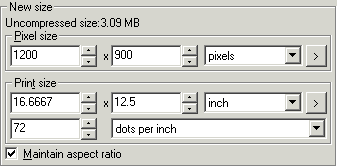
The New Size dialog is the most important part of ShortCut PhotoZoom Pro. It allows you to specify how big the new resized version of the original photo will be, in a number of different ways. You can either specify the number of pixels or a certain print size. Anyone who is familiar with Photoshop's Image Size dialog box will feel instantly at home.
Resize Method
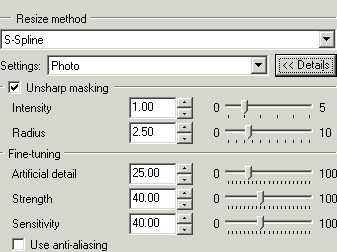
The Resize Method dialog allows you to choose how the original photo will be resized. The are a number of different methods that you can choose, including well-known ones such as Nearest Neighbour and Bicubic. The default method and the one that is only available through ShortCut PhotoZoom Pro is S-Spline, a proprietary resizing technique that promises to produce better results than the other methods. This is the one that I selected.
Once you have chosen a particular resize method, you can then adjust certain parameters. If you choose any of the methods except S-Spline, you are limited to applying Unsharp Masking. If you choose S-Spline, you can select one of the presets, such as Photo, Graphics and Text. If you wish, you can then fine-tune the settings even further, adjusting things like Strength and Sensitivity. This gives you as little or as much control as you want over the final result.
Batch Processing
![]()
The Pro version of ShortCut PhotoZoom allows you to resize more than one file at once via the Batch Processing option. Simply click the New Batch button on the toolbar and the dialog shown above is opened. You can select which images you want to resize by browsing your hard drive or choosing a particular folder. The program will add the images to the batch and you can then alter the settings for each one. Finally click the Run button and all of the images will be resized. It's very useful if you have a large number of files that you want to resize, as you can leave your PC to finish the task and go and do something more useful.
Conclusion
(out of 5 stars)
ShortCut PhotoZoom Pro is a software program which concentrates entirely on one thing - resizing your images whilst maintaining the best quality possible. I used it to create a 30x20 inch print at 254dpi from a Canon EOS 10D source file, and also to interpolate some 10D files up to 48Mb in size for submission to an image library. I used the S-Spline method for both, but turned off Unsharp Masking as I use a Photoshop action to sharpen my files. To cut a long story short, both the customer and myself were more than pleased with the large poster-sized print, and my first batch of images were accepted by the image library. ShortCut PhotoZoom Pro allowed me to quickly and easily resize my photos and achieve excellent end results - exactly what it is intended to do.
Leave a Comment about this Review
You can find alternative reviews of Shortcut PhotoZoom Pro here:
Samples
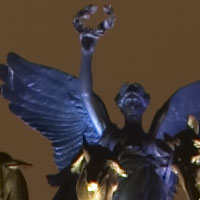
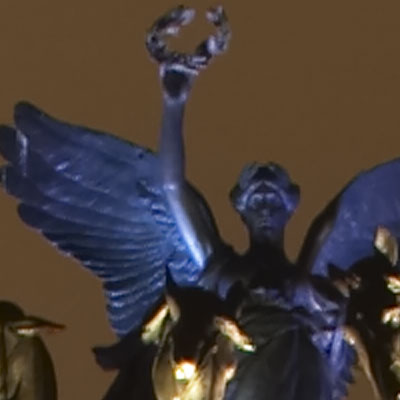
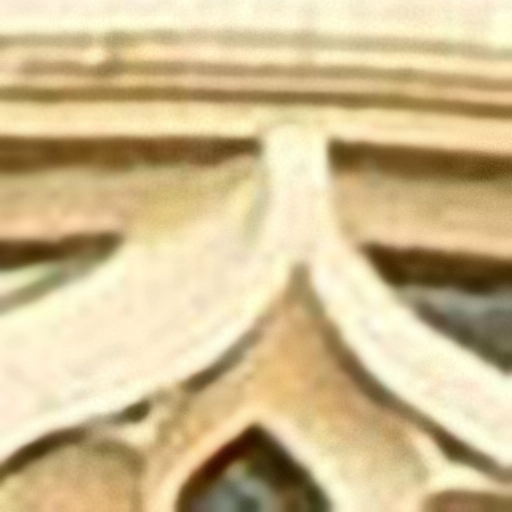
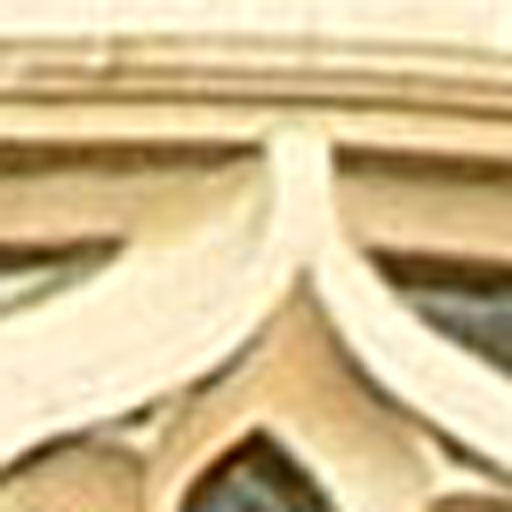
As requested, I have added a few samples. The following images are 100% crops of the original image, saved as JPEG Quality 60 in Photoshop. Neither the original or resized images have been sharpened. The first image is the original, the second resized by 200% in Shortcut PhotoZoom Pro, and the third resized by 200% in Photoshops 6.
 |
 |
 |
 |
 |
 |
The following images are 100% crops of the original image, saved as JPEG Quality 60 in Photoshop. Neither the original or resized images have been sharpened. The first image is the original, the second resized by 800% in Shortcut PhotoZoom Pro, and the third resized by 800% in Photoshops 6.
 |
 |
 |
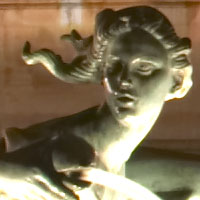
Official Samples
Shortcut have also sent me some sample images.
The first image in the folllowing sequence is the original, the second resized by 1500% in Shortcut PhotoZoom Pro, and the third resized by 1500% using Bicubic.
 |
 |
The first image in the folllowing sequence is the original, the second resized by 250% in Shortcut PhotoZoom Pro, and the third resized by 250% using Bicubic.
 |
 |
 |