Sharpener Pro 3 Review
Review Date: November 11th 2008
Author: Jon Canfield
Leave a comment about this Review
Introduction
Sharpening digital images can be a problem for many people. It�s easy to over-sharpen, creating artifacts and halos that scream digital manipulation, and the controls in Photoshop aren�t that intuitive. So, sharpening tools like Photokit Sharpener and Nik Sharpener Pro are popular alternatives to the standard Unsharp Mask method in Photoshop. The newest release of Nik Sharpener Pro is version 3.0 and it offers a number of new features and improvements that make it well worth a look.
Ease of Use
Sharpener Pro 3.0 has the new standard interface found in other Nik products like Dfine and Silver EFex Pro, and along with a plug-in for Photoshop, you can also install an Aperture 2.1 compatible plug-in (hopefully a Lightroom 2.1 compliant version will follow soon). Along with a large preview area, Sharpener Pro 3.0 allows you to zoom in for more detail. You also have the Loupe, in the lower right of the window, for a full-size before and after comparison.
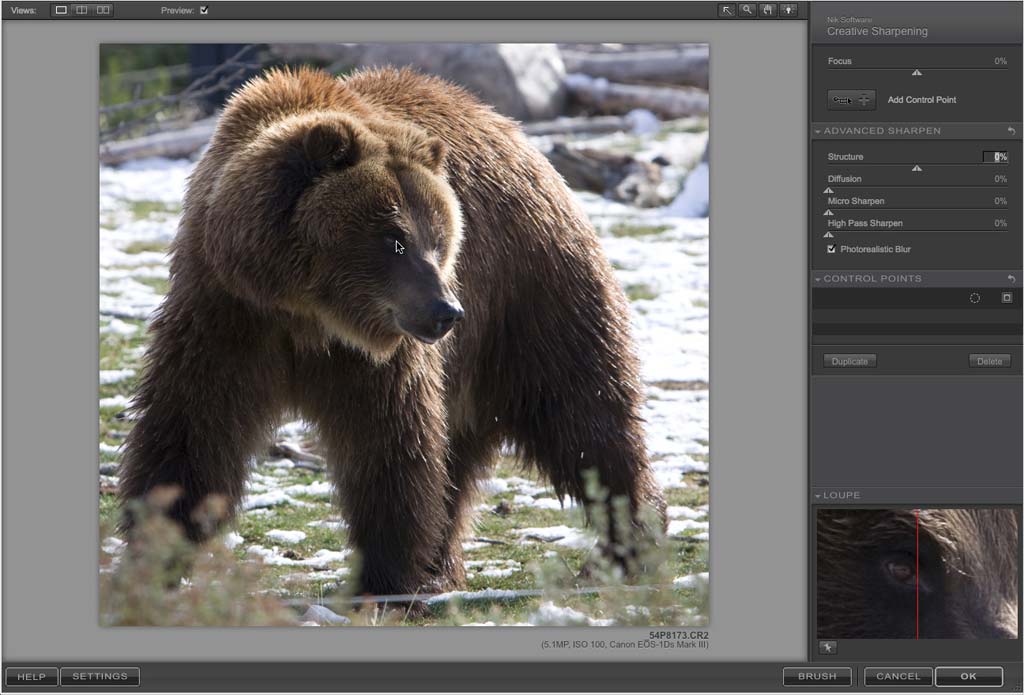
Figure 1
There are three modes available in Sharpener Pro 3.0. The first is RAW Presharpening, which is useful for overcoming the softening that is inherent in most digital images. This sharpening pass, if you choose to use it, should be a more subtle pass on the image, done prior to any other adjustments in Photoshop or Aperture (if you use the RAW Presharpener, be sure to turn sharpening off in the RAW converter).
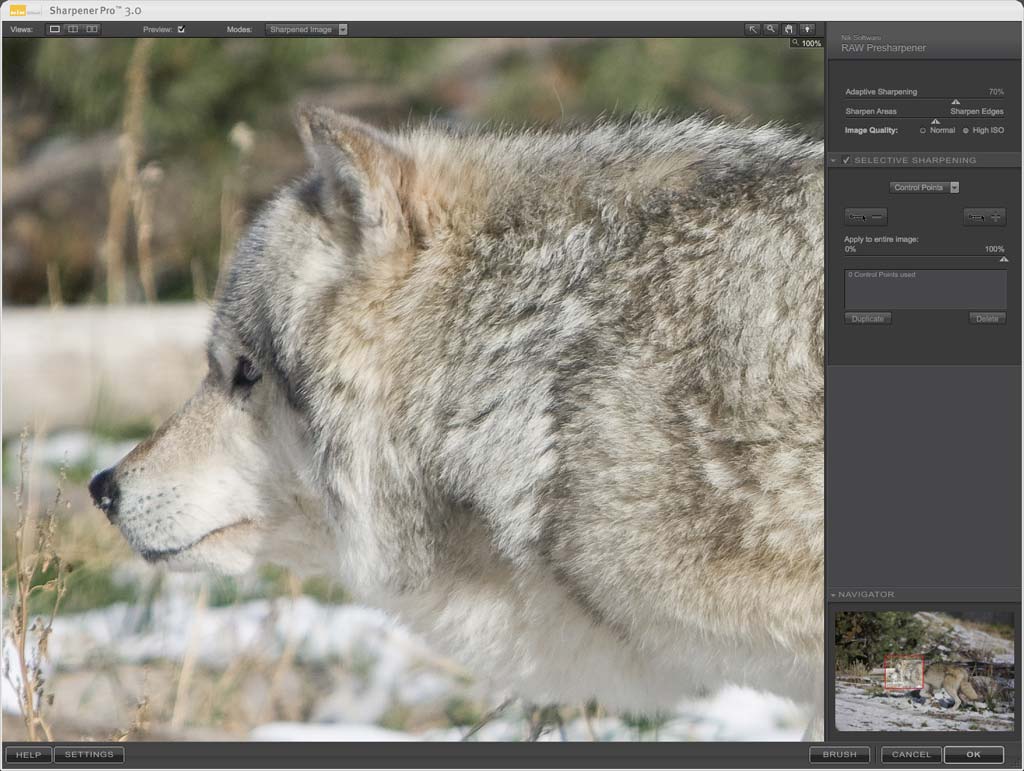
Figure 2
The Creative Sharpener is used to control the strength of the output specific sharpening as well as applying sharpening to specific areas of the image with the use of Control Points, a feature found in the other Nik plug-ins that make selection of specific areas of an image much easier than traditional masking techniques.
The Output Sharpener is where most people will find Sharpener Pro 3.0 the most useful. Here you can select the type of sharpening done based on what type of output you�ll be using, either print or display. �Along with the expected Display and Inkjet settings, you�ll also find Half Tone, Continuous Tone, and Hybrid Device. Each of these types has specific presets available for the common output choices, such as Luster, Glossy, Matte, Canvas, and Textured/Fine Art for Inkjet. You can also set the resolution of your printer, and the viewing distance. By default, the viewing distance is set to Auto, based on the size of the image. If you have settings you frequently use, you can create presets, such as the one shown here for Epson Exhibition Fiber.
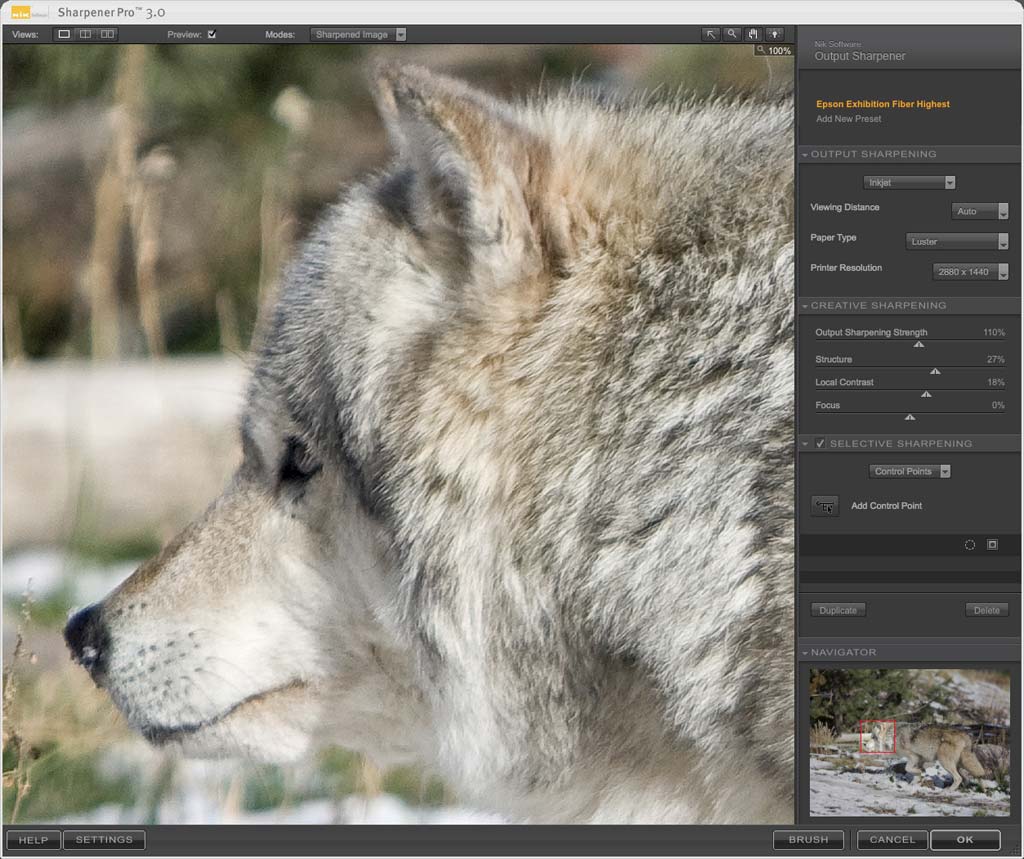
Figure 3
Controls for Output Strength (similar to Unsharp Mask�s Amount slider) to control the overall strength of sharpening, Structure (similar to Radius in Unsharp Mask) controls how fine detail areas are handled, Local Contrast which emphasizes or softens the edges of objects, and Focus which controls the adaptive sharpening of details (similar to Threshold in Unsharp Mask)
Control Points can be added to an image to set sharpening options specific to that area. For example, you may want to sharpen the eyes more than the rest of the face. By adding Control Points, you can easily do this without having to create a mask around the selected areas. By clicking the Mask View (or holding down Control/Command), you can see the areas being affected by your adjustments. White indicates the effect will be fully applied, Gray is partial application, and Black has no affect applied.
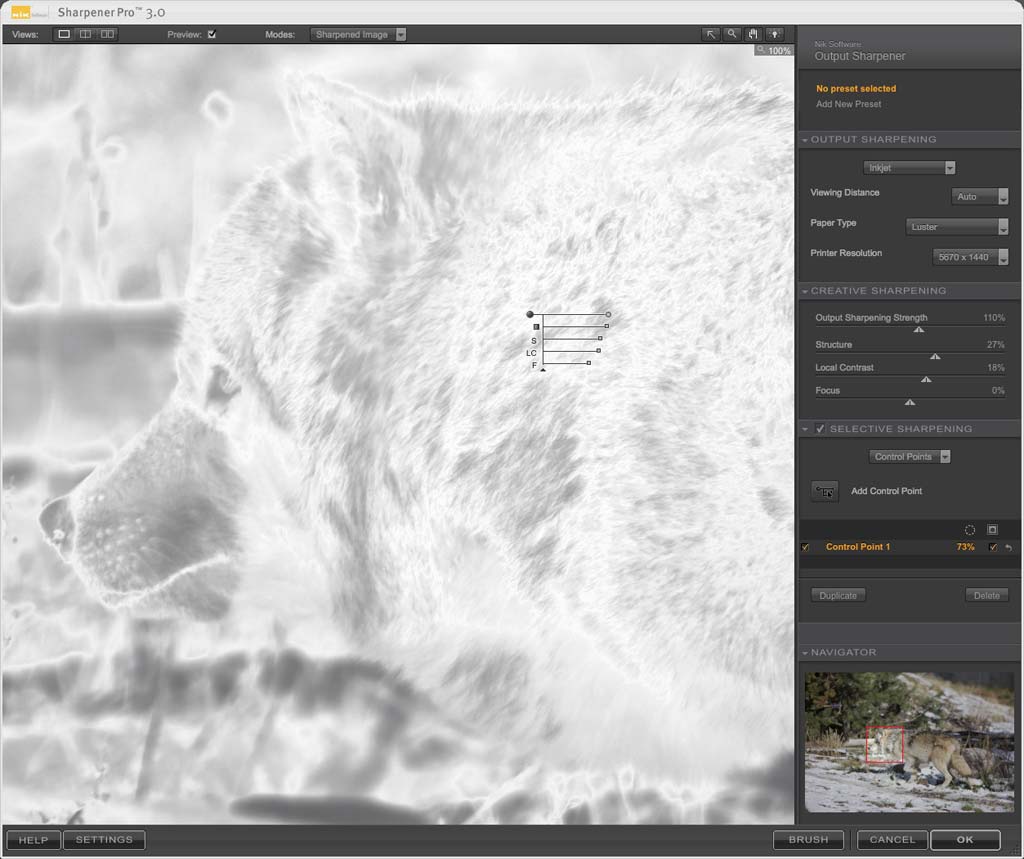
Figure 4
You can also apply differing amounts of sharpening to specific color ranges by selecting Color Ranges from the dropdown list in the Selective Sharpening section.
A new and unique feature of Sharpener Pro 3.0 is the Soft Proof option that allows you to see on-screen the results of your sharpening options prior to printing the image. A scale is displayed on screen that shows how large an area is covered by 2 inches. What makes this mode even more useful is the ability to make adjustments to your sharpening while in Soft Proof view.
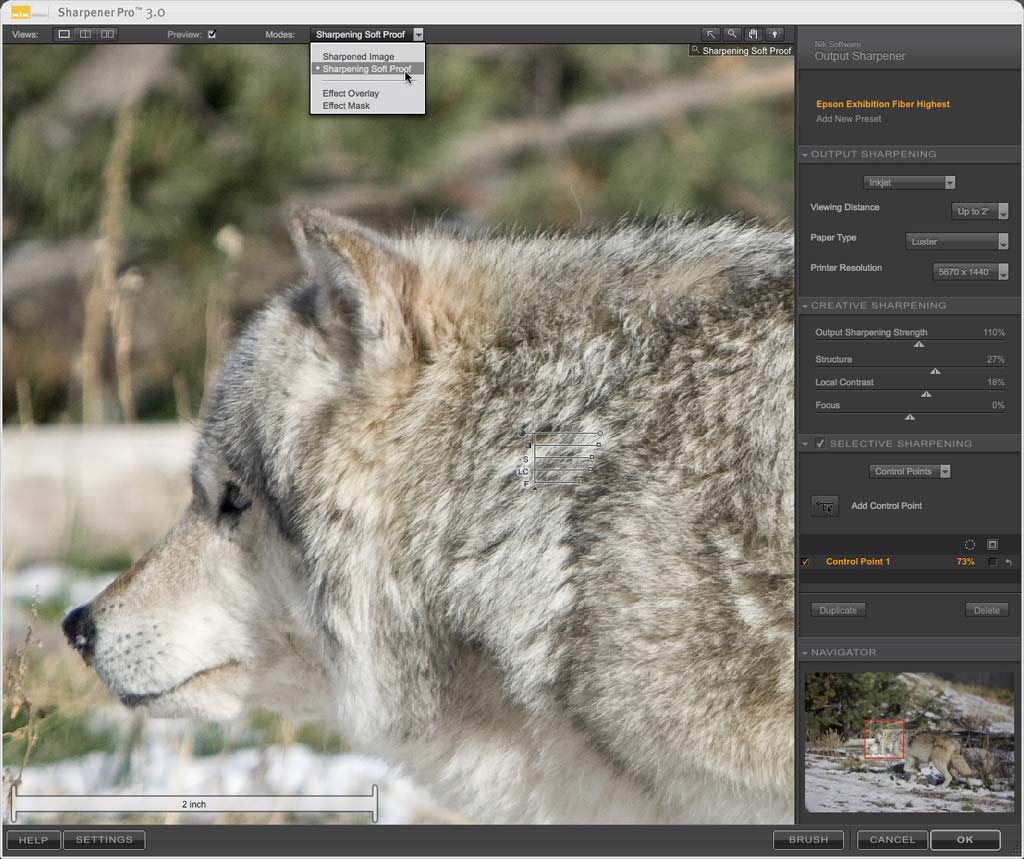
Figure 5
If you�re using Apple Aperture, you can apply sharpening settings to multiple images, giving a consistent look to similar image types and greatly reducing the time spent on image editing. Photoshop users can apply the effect as a layer or as a Smart Filter that makes editing settings after the fact possible. There is also the Nik Selective Tool that is accessed by clicking on the Brush button at the lower right of the window. This lets you use the Brush tool in Photoshop to selectively paint the sharpening on or the Erase tool to remove the sharpening from specfic areas. There is full support for pen input, including pressure sensitive control over how strong the effect is applied.
Conclusion
| |
|
|
Ratings (out of 5) |
|
| Features | 5 |
| Ease-of-Use | 4.5 |
| Value for Money | 4.5 |
I tested Sharpener Pro 3.0 on a wide variety of image types, and in every instance I was able to produce better results than I could using Unsharp Mask alone. I also compared the results to Photokit Sharpener, which I find to be a very good tool. The results were similar, but I had much better control over the sharpening process, and more visual feedback to what was happening with Sharpener Pro 3.0.
If you�re looking for a tool to assist with creating the sharpest, natural looking image possible, Sharpener Pro 3.0 is impossible to beat. I personally don�t find the RAW Presharpening to be that useful for my workflow, but I can see where it would have a place for some users.